
Easy Sourdough Boule using the Stretch and Fold Method
Sourdough can be really intimidating. But, if I can do it, so can you!
This easy sourdough boule seems like it has a lot of steps, but once you do it the first time, it gets easy and can actually be super fun!
What is the Stretch and Fold Method?
The stretch and fold method of making sourdough is just an alternative process to kneading the dough and helping the gluten develop. This method creates those beautiful bubbly holes in the bread and an airy center. I find this method super satisfying and even relaxing. It reminds me of playing with play-doh when I was little.
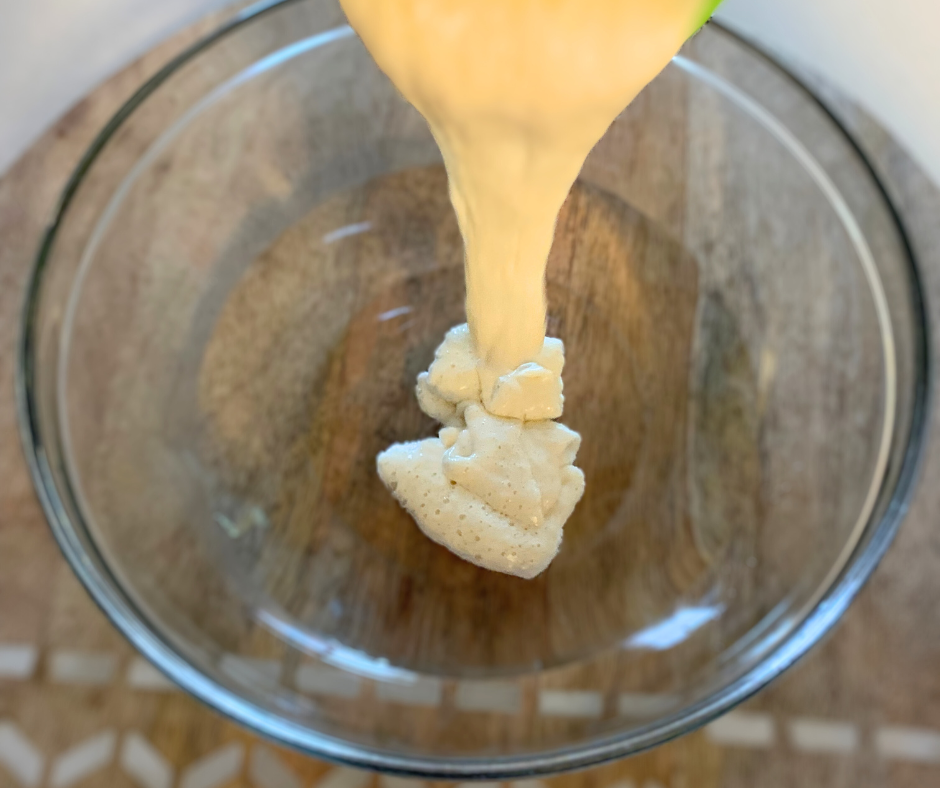
Mixing the dough
First you want to mix your water and sourdough starter in a large bowl with a wooden spoon or silicone spatula. Next you’ll add your flour and salt. I like to add my flour about a cup at a time to make the combining easier. Mix until all flour has been combined and there is no loose flour. Next cover your dough with a tea towel or plastic wrap and leave it in a warm place for about an hour. This step is important and allows for the flour to absorb the water. This is called autolyse.
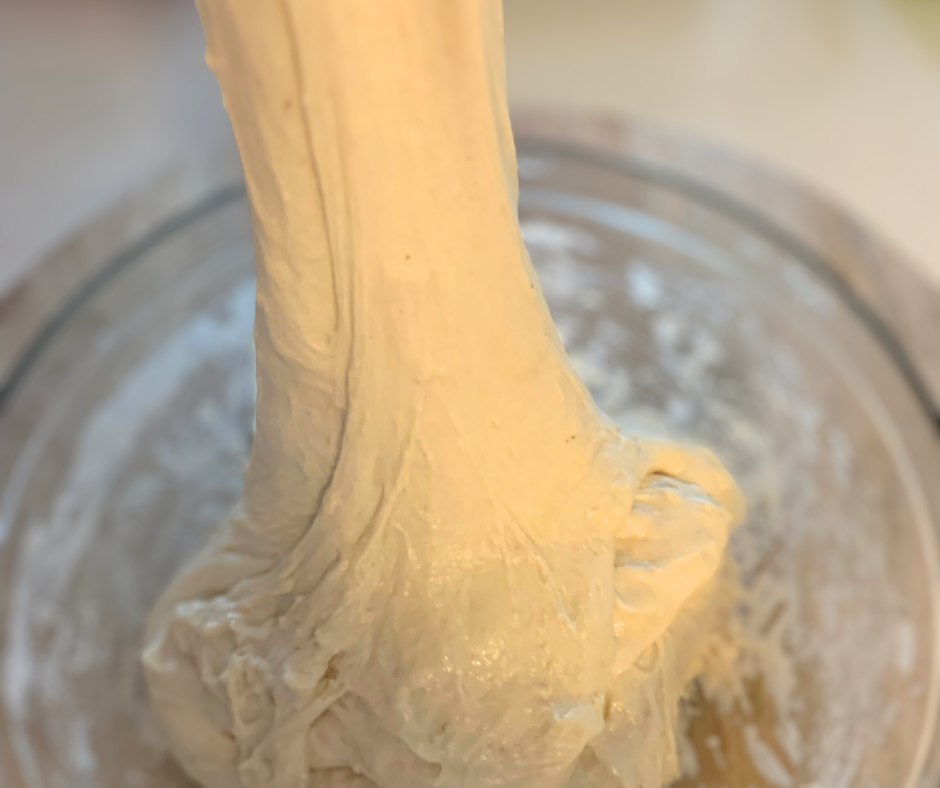
How to complete stretch and folds
Now the fun part! You are going to do a series of stretch and folds every 30 minutes. Do this until you have completed four rounds of stretch and folds. To do this, envision your dough having four corners. Wet your fingertips (to help the dough not stick to your fingers), grab the dough from the side of one of these corners and pull upwards. It may be difficult to stretch the dough the first fold or so, but adding a little wiggle motion as you pull up helps. Next fold the dough across the middle. Complete this process until all “four corners” have been stretched and folded. This is one round of stretch and folds. Cover the dough and complete 3 more rounds.
Bulk ferment
Once you’ve completed all of the stretch and folds, it is now time to bulk ferment the dough. Place your dough in a warm place and cover with plastic wrap or a towel. Let it ferment until it doubles in size. This can take as little as 4 hours or up to 12 hours. There are many factors to how quickly your dough will rise, such as room temperature, how mature your starter is, etc. Be careful not to let it over ferment or it can become a sloppy mess.
Shape the dough and rest it
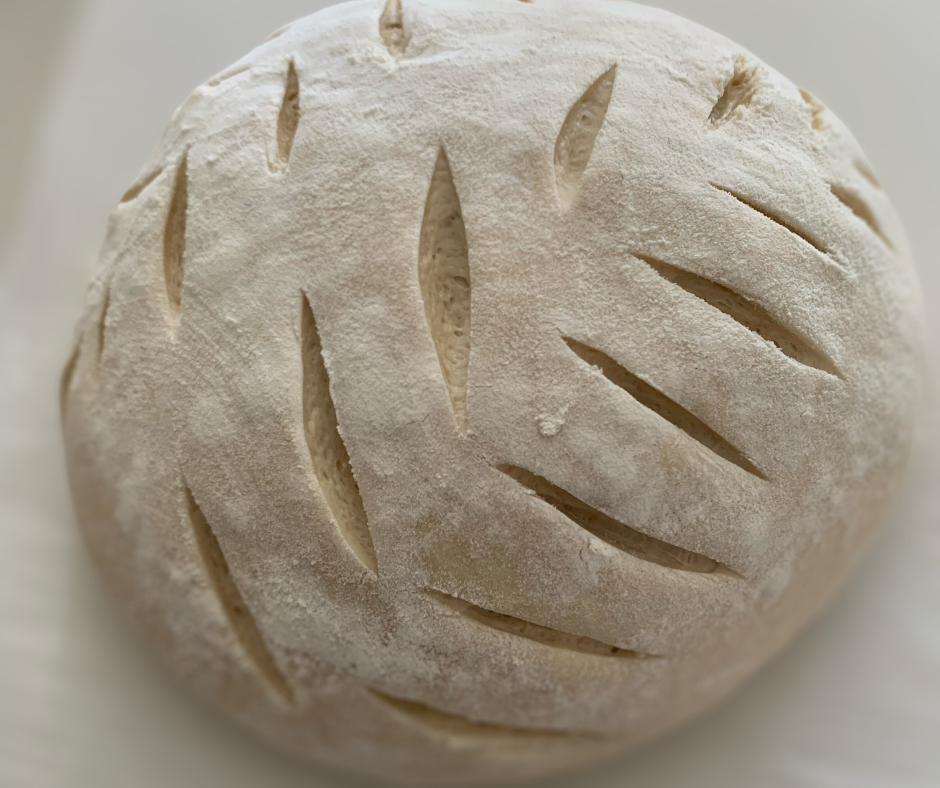
Now you’ll want to shape the dough. Pour the dough out onto a clean, floured surface. Fold the dough over itself and roll it towards yourself to shape it into a neat ball. This helps with the rise of the dough as it bakes. Flip it over and pinch the seams together. Lightly flour a banneton basket or bowl and gently place you dough inside and cover with plastic wrap or a towel. Place your dough in the refrigerator to rest for 12 hours. You can also rest the dough on the counter for around 4 hours instead. I prefer resting in the refrigerator because it makes it easier to score the dough and gives a better rise as it bakes.
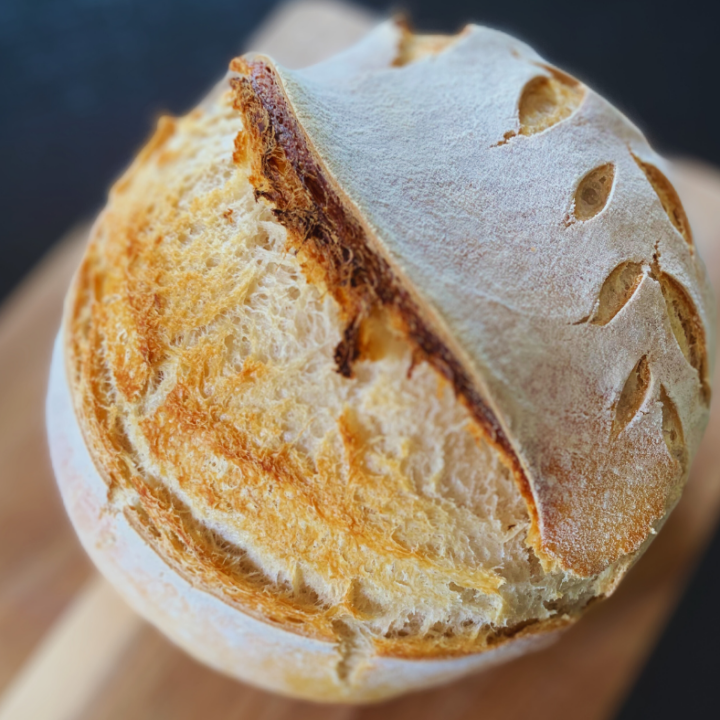
Bake the dough and enjoy!
After you’ve let the dough rest, you can score the dough, if you choose, and bake! Once it’s done baking, let it cool before cutting and enjoy!
Why Sourdough?
Sourdough is a fermented dough that is achieved through wild lactobacillaceae and yeast. In order to make sourdough bread, you use a natural leavening agent known as a “sourdough starter” instead of traditional yeast. Sourdough starter is created by mixing water and flour and allowing this mixture to ferment on your counter to create carbon dioxide bubbles. These bubbles allow the bread to rise naturally. The carbon dioxide is activated by the friendly bacteria and wild yeast in the flour and your environment. Sourdough is easier for your body to digest since it is naturally fermented. This makes sourdough bread more nutrient dense, easier to digest and lower in gluten.
Enjoy!
Easy Sourdough Boule
This sourdough boule has a perfect crispy exterior and light and fluffy center.
Ingredients
- 1/2 cup of active sourdough starter
- 1 1/3 cup of water
- 3 3/4 cups of flour
- 2 1/2 teaspoons of salt
Instructions
- Pour in water and sourdough starter into a large bowl and stir with a wooden spoon or silicone spatula to combine.
- Add flour one cup at a time and stir until combined.
- Cover with plastic wrap and let sit in a warm place for an hour.
- Now complete 4 rounds of stretch and folds every 30 minutes. Quick tip: wet your fingers to keep the dough from sticking. To do this you will grab the dough at the edge and pull it upward then fold it over itself toward the center. The first stretch may be tough, but it is helpful if you wiggle the dough a little as you stretch it. You will then turn your bowl a quarter turn and do the process again until all four quarters have been stretched. Recover the dough. You'll repeat this entire process 4 times every 30 minutes.
- Once all rounds of stretch and folds are complete, it is now time to bulk ferment the dough. Recover the dough and let it bulk ferment in a warm place for 6-12 hours until it has doubled in size. Don't over ferment!
- Next place the dough on a lightly floured, clean surface and shape the dough. Fold the dough and shape it into a ball by gently rolling it towards you.
- Next turn the dough over and fold the sides over to meet at the middle and pinch together.
- Transfer the dough into a floured bowl or banneton basket.
- Cover tightly and let the dough rest in the refrigerator for 12 hours. If you need your bread sooner, you can rest on the counter for 4 hours. The refrigerator rest is really good for making the dough easy to score and giving it a really good rise.
- Preheat your oven to 500 degrees Fahrenheit with a dutch oven inside.
- Turn your dough over on parchment paper, dust with flour and score with a lame, if you'd like.
- Place your dough into the dutch oven by carefully grasping the sides of the parchment paper and setting it inside the dutch oven.
- Bake for 20 minutes with the lid on.
- Remove the lid (careful it'll be really hot!), turn the temperature down to 475 and bake an additional 20 minutes or so. The crust should look golden brown.


